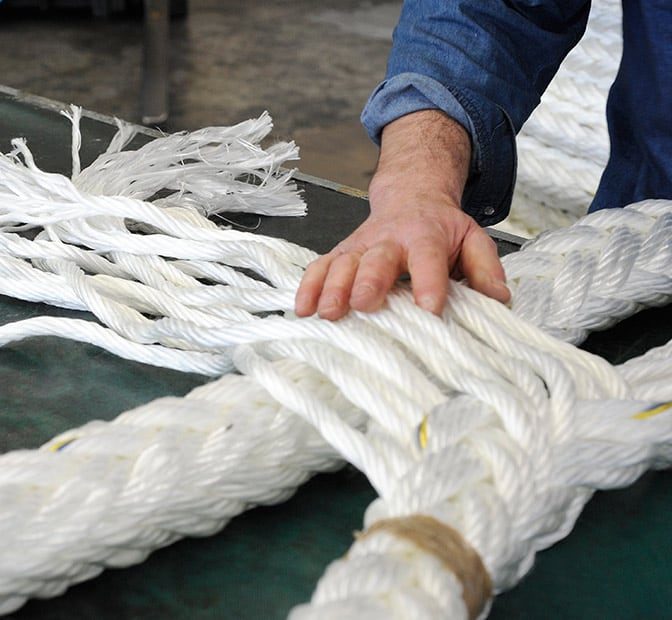
Splicing is vastly used in marine life in order to make semi-permanent joints between two parts of a rope. While knots weaken the rope by more than 20% most of the time, splicing attains a rope’s full strength. One type of splicing is the eye splicing used to create a rope loop, mainly for mooring purposes. Are you trying to find ways on how to tie an eye splice knot? In this blogpost the Katradis SA team shows you how to eye splice an 8-strand, 12-strand and 24-strand rope.
How to splice mooring rope step by step:
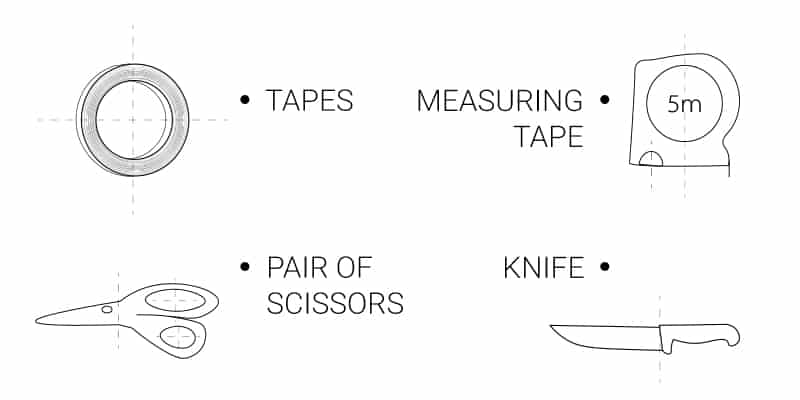
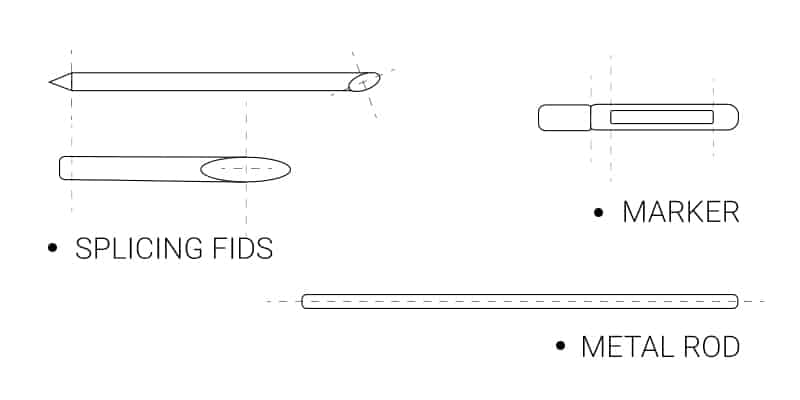
The tools you need to perform an eye splice to a synthetic or high modulus rope are:
Starting with splicing, you will need to measure the desired length, plus some extra length for the splicing. Usually a length of 4 meters should suffice to make an eye splice. Once you have decided on length, make markings on the rope strands and use some tape around the rope that will be unbraided next.
Now you will need to unbraid the strands and prepare the ropes for splicing. Keep in mind that you’ll have to separate the S-strands from the Z-strands. S-strands twist counterclockwise and Z-strands twist clockwise. S-strands will be spliced with Z-strands and Z-strands will be spliced with S-strands. This way, the inserted Z-strand pair runs along the adjacent two Z-strands, and the inserted S-strand pair runs along the adjacent two S-strands.
To prolong the rope loop’s life, a protective sleeve is recommended to be used. To attire the eye with the sleeve, pass the protective sleeve through the rope, after the point of the rope marking.
Splicing can take place for 8-strand or greater single-braided ropes and it is commonly used on synthetic ropes in order to create mooring tails or fixed point attachments. Yet, it can be used with the same efficiency on high modulus and double-braided ropes as well.
Before starting on splicing an 8-strand mixed rope, split the strands into two pairs of S-strands and two pairs of Z-strands. Wind some tape around the strand ends so that you can perform the splicing process easier. Use different colours for each strand type (e.g. S-strand black tape, Z-strand red tape).
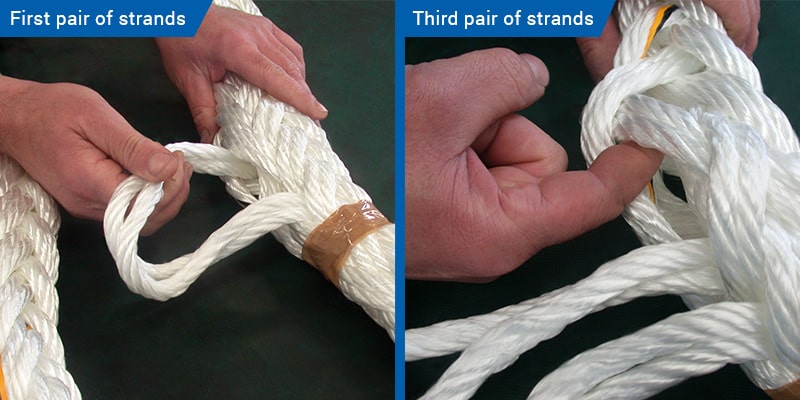
Insert a spike into the gap beneath two running S-strands of the rope to make an opening. In order to create a tenacious 8-strand multiplait eye splice, make sure the eye is not twisted. Insert the first Z-strand pair into the gap. With the same spike make an opening beneath the adjacent two running Z-strands. Insert the S-strand pair into the opening. Do the same for the other two pairs and then turn the entire rope over.
Repeat the same process for this side. Once a splicing circle is finished, turn the rope over again and continue the ropework until the strands are completely spliced. Tighten the rope strands slightly at the end and your 8strand eye splice is ready.
For a 12-strand high modulus rope you need to pull out the strands, six S-strands and six Z-strands. Tape the edges of each strand. You can use different colour tape for each strand type (S or Z). Use a fid if you want to easier pass the strands through the rope’s structure.
Begin to insert each strand of the same twist (e.g. Z-strands), until all the strands have passed through. Then turn the rope over and continue splicing the remaining strands of the opposite twist. After finishing the first circle of S and Z strand insertion, make an overturn once again to begin the second insertion circle.
Start again with the same ropes as in the beginning of this step. After the six strands have been inserted, there is no need to overturn the rope as done before. You can go on with the next 6 strands. Turn the rope over after a whole splicing circle is completed.
Continue the same procedure (inserting the S and Z strands) for two or three more circles. Tape the remaining ends of the strands (put together 4 strands at one taping) and cut the final edges of the splice.
Mark and tape the 24-strand nylon rope, counting 16 double strands of the same twist from the end of the rope (16 pairs of strands). This is sufficient for making 6 full strand insertions or tucks. From the taped point, carefully take out the pairs of strands one by one following the pattern meticulously. Attention must be paid at the removal of the third strand pair.
Take out the 3-strand core rope from the center of the 24-strand nylon rope and leave it like pictured below, in order to ease your next steps.

Tape the edges of each strand pair. Next, tape the edge of the 3-strand core rope with your metal rod. Insert the 3-strand core rope in the rope. The point of the core rope insertion is determined by the eye length you want to make. From that point you will begin splicing the strands. Take out the 3-strand core rope after 6 pairs of strands of the same twist.
Start your eye splicing with the first pair of strands. You should pay attention to the insertion point concerning the 3-strand core rope. Continue in the same pattern and complete the insertion of all the strand pairs of S and Z twist. Cut the excessive length of the 3-strand core and continue with the second circle of the splicing process.
Turn the rope over in order to begin the second insertion. Use the splicing fid to pass the strands through the rope. Snag the strands a little bit, in order to remove excess slack among them. Do the strand snagging after every completed insertion. After the completion of the third insertion, all the strands should emanate from the same spot of the rope’s circumference. Continue making more insertions with the same pattern until you complete three splicing circles or more.
The final rope loops should look like the following eye splice images:

Since 1936 Katradis SA has focused on extensive expertise in the design and development of high modulus and synthetic mooring ropes. Our expert engineers conduct regular rope durability and flexibility research. Our findings ensure that the highest rope standards and the strictest demands of the shipping Industry are being met every day.
If you need a reliable rope supplier with a worldwide presence offering high quality product availability, choose Katradis SA.
Follow us on Facebook, Instagram, Twitter and LinkedIn to learn more about us and keep a close eye on our product testing activities.